Goodbyes are so hard. Especially when your diabetes device decides to say “sayonara” earlier than expected. Your CGM and insulin pump are expensive. Replacing sensors and adding site changes can get pricey. Besides, who wants an extra poke for no reason? Whether you’re in camp Libre, Guardian, or Dexcom, regardless of which insulin pump you use, here are 10 tried and true ways to get your CGM and insulin pump to stick around.
(This article contains affiliate links. I like to show you where you can get products that might make your journey with T1D a little easier. If you make a purchase through one of the links, I get a bit of a commission at no extra cost to you!)
First things first. If you’re having trouble keeping on a device that is meant to stay on for 3, 7, 10+ days, contact the company. Many companies will replace sensors or sites that fall off prematurely. Get a free replacement, don’t pay for it out of your own pocket.
And make sure you call in each individual one that comes off early. It might seem like a good idea to report multiple problems at once. It’s less time-consuming, that’s for sure. But, you might just get replacement days instead of replacements for each site you lost early.
For example, if your 10-day sensor only sticks for 7 days, and another one sticks for 8 days, the company might only replace 1 sensor, since you only lost 5 days total, but if you call them in individually, you get 2 sensor replacements.
Now that that’s out of the way…
Obviously, you don’t want to be inserting devices more frequently than necessary. And calling diabetes tech companies non-stop is exhausting. Since you’ve figured out that it’s tricky to get the device to stay on your skin, let’s find some ways to fix that.
1. Avoid doing a new site or sensor when your skin is damp.
The adhesive on any diabetes device needs to stick and stay stuck. Getting it wet while the adhesive is drying is not helpful. When you insert a new device, give it a bit of time for the adhesive to dry before hopping in the bath, shower, or going swimming.
Likewise, make sure that your skin is clean and dry before attaching a new site, pod, or sensor. Even a small amount of moisture can cause problems for a new insertion.
And if you’re having a bath or shower soon before putting on a new device, avoid moisturizer in the area that you’re going to be putting the device. That includes moisturizing soaps!
2. Exfoliate and use alcohol wipes.
Exfoliating is important for everyone. Even more so when you want your T1D devices to stick to your skin. Get rid of the layer of dead, flakey skin before attaching your new device. It can make a world of difference. If the area that you’re attaching your pump or CGM to is fairly hairy, you might also want to consider shaving before putting the device on.
Wiping the area with an alcohol wipe (or two) right before insertion helps a lot. First, you’re cleaning the skin that you want to stick your device to. That lowers the risk of infection, which can occur with anything that punctures the skin.
Also, it gets rid of anything on your skin that shouldn’t be under the adhesive. Of course, make sure the alcohol wipe has fully dried before inserting your device. You can get alcohol wipes from your local pharmacy, most grocery stores, or even order some online: Care Touch alcohol prep pads.
3. Tegaderm can make it stick.
Lots of people swear by Tegaderm patches. They’re fairly inexpensive and can be purchased at most pharmacies. They can either go on top of diabetes devices or underneath.
You want to put it underneath if you have allergies or reactions to the adhesive on your devices. Tegaderm acts as both an adhesive as well as a barrier.
However, some people find that Tegaderm makes pump and CGM sites come off even easier when it’s put underneath the device. This will vary depending on your skin type so it’s trial and error.
If you don’t have problems with rashes, placing it overtop of your device works well for many people as well.
4. Arm bands can hold it in place.
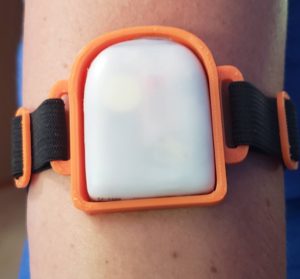
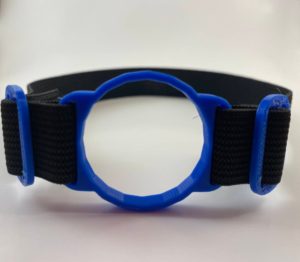
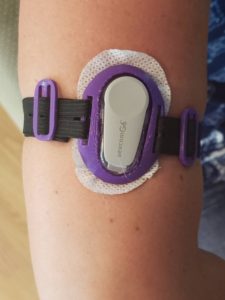
Reusable arm and leg bands are a great option. There are armbands specifically for Omnipod, Libre, and Dexcom G6.
What if you don’t have the money for armbands? Grab a cheap pair of socks from your favorite dollar store. Make sure they’re big enough that the opening would fit snuggly around your arm where your CGM or Omnipod site is. Cut off the top of the sock and secure it over the site. Now you have a simple, homemade armband.
Bonus: often armbands also help avoid those frustrating compression lows that can happen with Dexcom during the night!
5. Vet wrap
Vet wrap is a great option for people who have sensitive skin. It sticks to itself instead of the skin or diabetes device. So, it’s easy to remove and doesn’t cause skin irritation like some other options might.
If you find your devices usually do stick by themselves, but you’re concerned because you’re going swimming or to the beach, vet wrap is easy to put on and take off over and over whenever you need it. It also comes in all kinds of fun colors and patterns!
6. Keep away from sunscreen
Sunscreen can ruin the adhesive on your diabetes devices. Of course, you want to use sunscreen to protect your skin, but be aware of how close to the device you’re getting when you apply it. Creams and oils can easily cause the device to start peeling off too early.
It’s also worth noting that if you use spray sunscreen, it can actually crack the casing in Omnipod pods if you spray it over the pod. This makes it so that water can get into the pod, which is really bad. Be very aware of diabetes devices when using sunscreen.
7. Skin Tac or Skin Prep
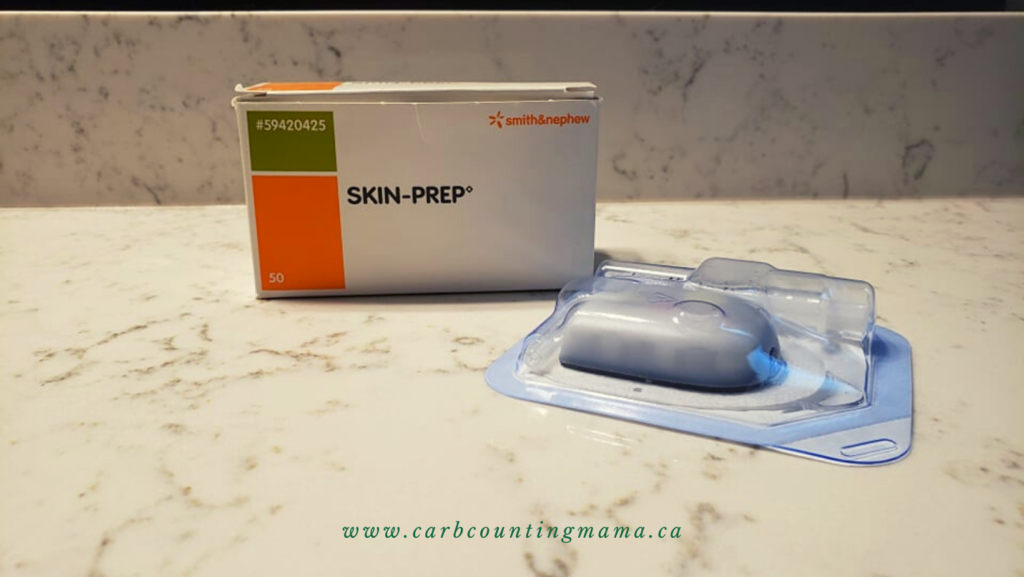
These little wipes look similar to alcohol wipes. Instead of cleaning the area, they add a bit of stickiness to your skin before inserting your device. You want to put it on your skin and let it partially dry before putting on your CGM or pump. It’ll have a tacky/ sticky feeling when it’s ready.
The wipes are really helpful because you can make kind of an “O” shape as you put it on. This means you can avoid putting the cannula or filament through extra layers of adhesive while allowing the outer part of the device to stick a lot longer.
That said, inserting the device through a thin layer of adhesive should be fine. If that’s a concern for you, Skin-Prep wipes are a great option.
You can get these in either wipes or spray depending on your preference.
8. Try different site locations
With diabetes devices, location matters. There are limited sites that are “approved” by most companies, but people use sites all over their bodies.
“Approved site” simply means that the organization that tests products for safety and accuracy in your country (FDA for the United States, Health Canada for Canada) tested that location. It doesn’t mean other locations are unsafe, just that they haven’t been officially tested.
You want a spot that is stable. A body part that frequently stretches or that gets sweaty quite easily is not the best choice. Locations that can be bumped easily in your day-to-day life are not going to work well either.
I’ve seen pump and CGMs on the: back, chest, stomach, arm, forearm, upper butt, thigh, calf… you name it, someone has tried to place a diabetes device there.
If devices in a certain location keep coming off early, try a different spot. You’ll be surprised at the difference.
9. Patches, patches, patches!
I love diabetes patches for a few reasons.
- There are SO MANY to choose from! If one doesn’t work very well for you, a different kind might do the trick. If one is uncomfortable, or irritates your skin, another company will have one that is a better fit for you.
- You can get any color or design that you can imagine. There are shapes, patterns, designs. You like dinosaurs? There are dinosaur patches. Unicorns? Someone has made a patch for you. Want it to match your skin tone? That can be done too.
- A lot of the companies are run by people who have T1D themselves or who have a child with T1D. That means they know what they’re doing AND you get to support a fellow T1D when you buy from them. Win win!
Here’s a favorite among the T1D community:
Rock A Dex
Rock A Dex has all kinds of patches for any diabetes device you can think of. There are pre-cut patches or patches that don’t have a hole. They have everything from rainbows to skulls, outer space to honey bees. They even have some beautiful “Color Me” patches for children and adults.
I absolutely LOVE this sloth patch. They have several options in this series (including an elephant, unicorn, and panda) and I think they’re the coolest patches I’ve ever come across!

When we need a patch (which isn’t often), we use the free ones from Dexcom. They work great for my son. But, I know people who have used them and they don’t stick at all. Remember, different skin types will need different patches. Sometimes even different locations on the body need different adhesives. So keep that in mind when using CGM and pump patches!
10. KT tape
KT tape is a sports tape that athletes often use. It can be a great option because it’s very flexible, hypoallergenic, and breathable.
Since it’s made for athletes, KT tape tends to do better with sweat and high activity. So if you’re going to be exerting yourself, this might be a good option for you to keep your diabetes devices in place.
It’s important to remember:
- Everyone has different skin types, so something that works wonders for one person, may not work at all for the next person. But there are so many options. There are options for every skin type.
- Some patches and adhesives can cause skin irritation or rashes. If this happens to you, consult your doctor. You’ll likely need to try a different product for keeping your CGM and insulin pump sites on.
- Oil and adhesive don’t mix. I went over sunscreen and moisturizers in this article, but ANY oil will make it more difficult to keep your device attached to your body.
- Different conditions can cause devices to fall off more easily. Even if you never need to secure your diabetes device, that could change if you change your routine. Extra swimming, sweating, and humidity can cause diabetes devices to start peeling early, even if you usually don’t have that problem.
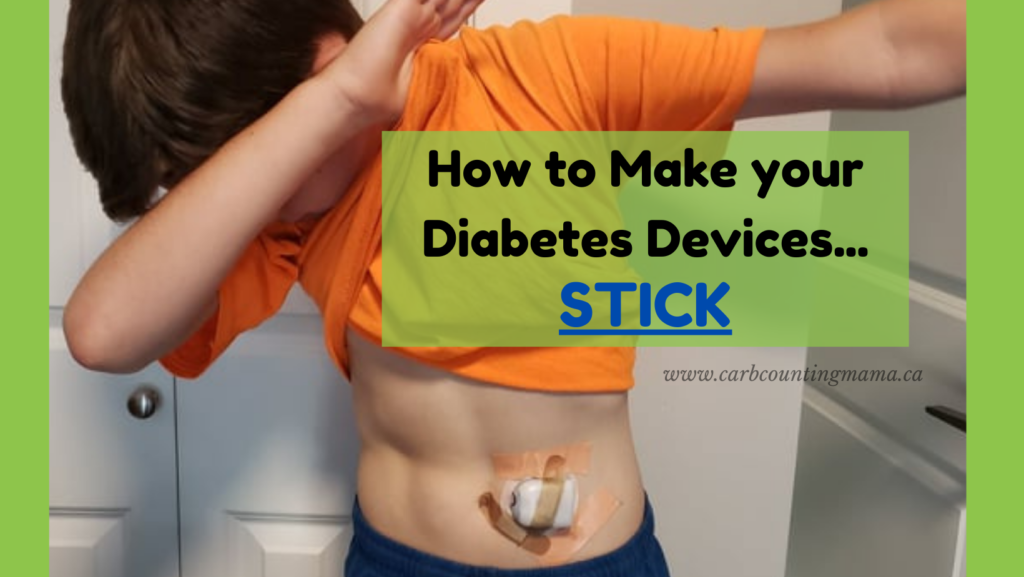
Jordan and I were goofing around with the bandaids and random tape we found in our junk drawer to take a silly picture for this article. But, if you’re in a pinch, these things actually do work. It doesn’t look pretty, but if you’re out and about and trying to get the last few days out of your Dexcom sensor, or wanting a bit of extra protection over your pod during swimming, anything that is meant to stick to skin will work temporarily. I’ve even seen people use duct tape to keep their diabetes devices on!
What do you use to keep your T1D devices on? Is your go-to on my list? Tell us about it in the comments!
For more tips and stories about T1D, join the Carb Counting Mama email list, and make sure to head over to the Carb Counting Mama Facebook page and “like” it.
Leave a Reply